About

I'm Andrea, and this is my personal blog. Thanks for being here! I usually post on Fridays and Sundays, when I share something that makes me happy or a spiritual thought for the week. Sometimes I manage to squeeze in another post or two.

Feel free to leave a comment--I'd love to hear what you have to say! You can also reach me at teachmetowalk [at] hotmail [dot] com.

Scrollin' Buttons

Showing posts with label Recipes. Show all posts

Tuesday, March 5, 2013

This post is way too corny.

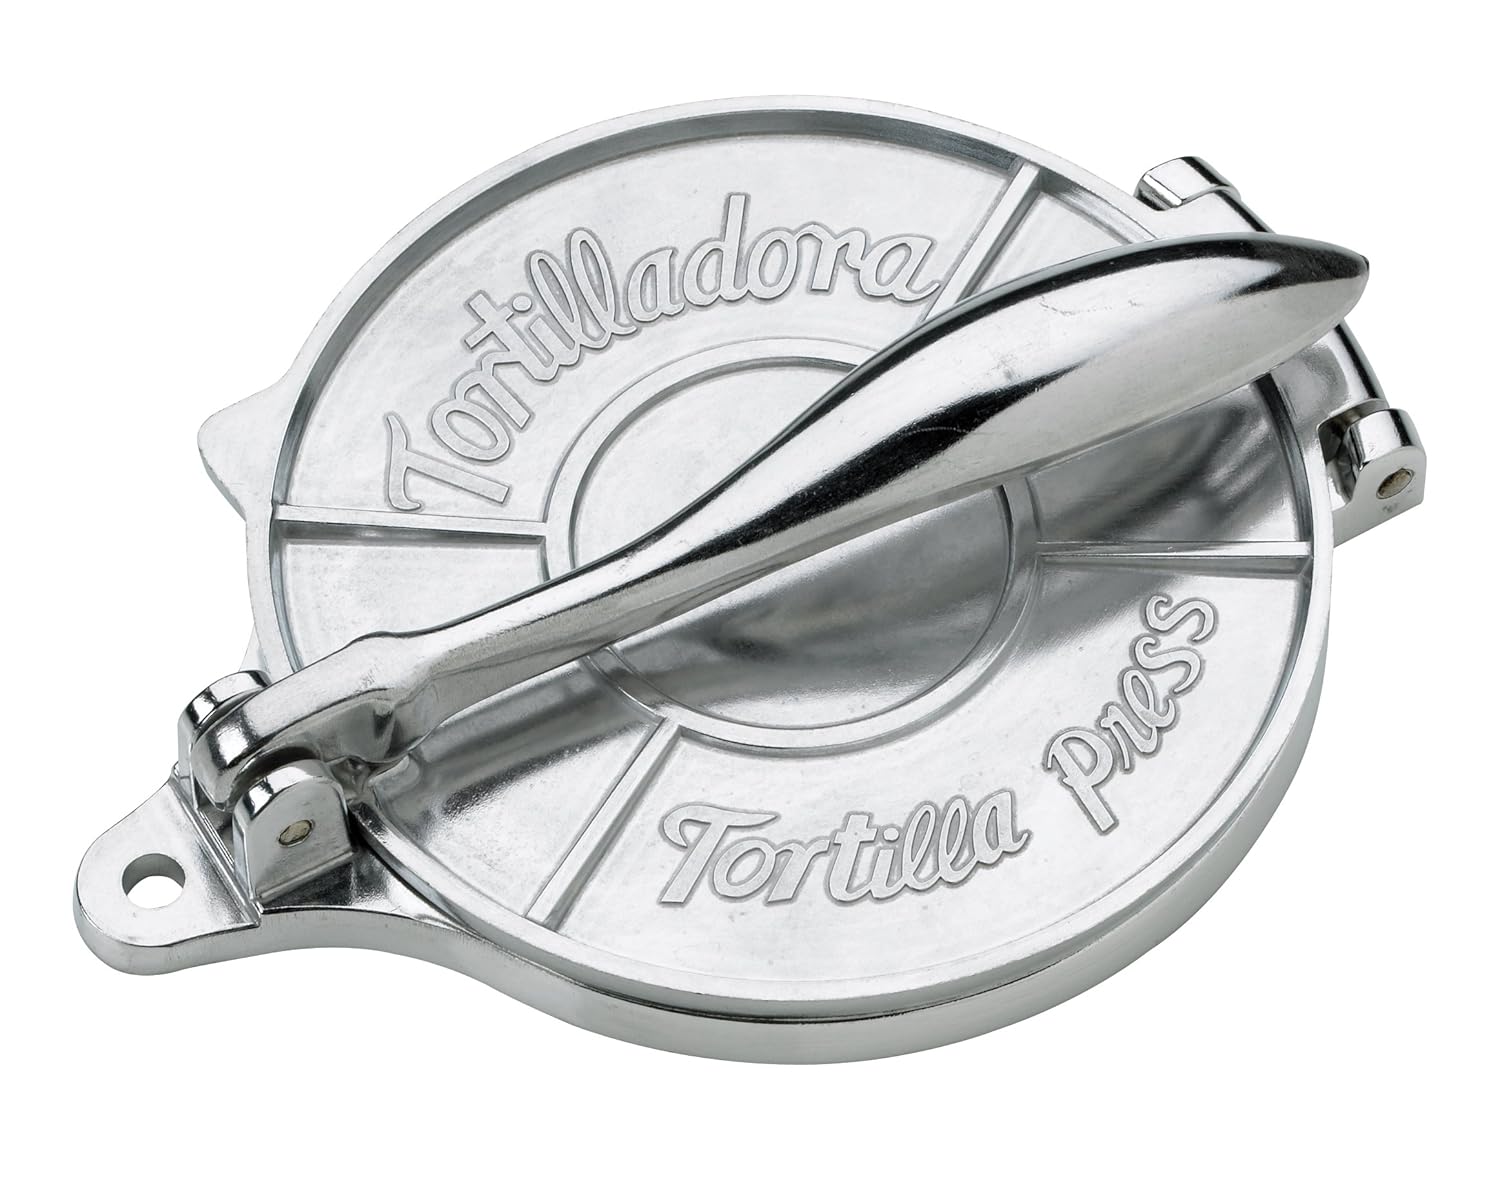
[If I weren't so lazy, I would've taken a photo of my
actual tortilla press. Alas, I am lazy.]
I have always hated corn tortillas.

Or, I guess I should say that I had always hated corn tortillas...until I bought a cheap tortilla press and some masa*, and made some of my own.

(Why would someone who hates corn tortillas decide to make some herself? I can't really say. But it was a good decision.)

Turns out that homemade corn tortillas taste amazing. Plus, have you ever looked at the ingredient list on a package of tortillas from the grocery store? It's not terribly long, but there are several preservatives listed (and food dye and thickeners, in some cases). As for the homemade tortillas, I use 100 Days of Real Food's recipe, which contains three ingredients--and that's including water.

Now, I'm not saying that I think you're a bad person if you eat store-bought corn tortillas. I'm not even saying that I'll never eat a store-bought tortilla again. I'm just saying that I loooooooove corn tortillas now, and the three-ingredient thing makes me happy.

Also? Squashing a ball of tortilla dough in a tortilla press is kind of fun.

*Masa is Mexican corn flour--or it can also mean the dough made from the flour. Unlike American cornmeal, masa is whole grain.

Thursday, December 22, 2011

My Favorite Christmas Cookies

Shortbread cookies with icing and crushed candy cane on top. They melt in your mouth. This is the third year in a row that I've made them--I think that qualifies as a tradition, don't you?

It's not my recipe, though. Here's the link (scroll down to "Peppermint Shortbread"):

Peppermint Shortbread Cookies

Healthy? No, but they're better for you than the cookies at the grocery store. Mmm.

Saturday, November 19, 2011

Re-post: Cranberry Sauce Recipe

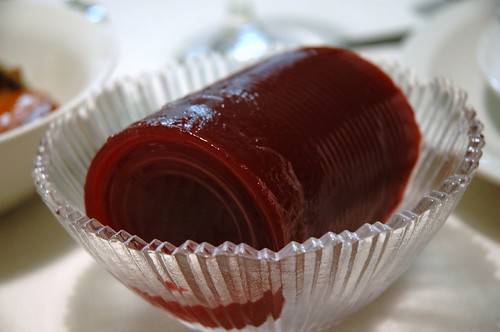
I don't actually have a glass-top stove. This was taken at my Mom's house.
[This is mostly a re-post from last Thanksgiving.]


I have to admit, I kinda like canned cranberry sauce. That's probably because of the high-fructose corn syrup that's in it. Gross.


But did you know that making cranberry sauce [y'know, with real cranberries] is simple? In fact, I first found this recipe in Real Simple magazine. See what I did there? Haha.

Anyway, I made this cranberry sauce last year for Thanksgiving, and I'm probably going to make it every Thanksgiving for the rest of my life. It tastes that much better. (Unless you really don't like cranberries at all. In that case, I can't help ya.) You can check out the original cranberry sauce recipe if you want. I've changed it just a little bit, so here's the really simple cranberry sauce I'm making this year:

Homemade Cranberry Sauce
(heavily based on a recipe from Real Simple
1 package cranberries (I think the standard-size package is 12 oz or so.) 
1 cup apple juice 
up to 1/2 cup sweetener of your choice (honey, brown sugar, whatever; optional)
Combine all ingredients in a medium saucepan. Simmer, stirring frequently, until almost all of the cranberries have burst, and the sauce has thickened. (I usually make the sauce quite a bit thicker than what's pictured with the original recipe.) 

Taste and add sweetener if needed--some cranberries are kickier than others, but the apple juice on its own is sometimes sweet enough. Also, keep an eye on how vigorously those berries are simmering--if it gets to a full-out boil, you'll be wiping up cranberry splatters.

Really and truly--all you have to do is measure, dump, and stir. That's it. Oh, and eat. And then do a little happy dance because you've freed your family from canned cranberry sauce forever. 

Tuesday, November 15, 2011

Recipe Link: Pumpkin Pasta Sauce

I'm in lo-o-o-ove with this pumpkin pasta sauce recipe. I've made it twice in the last three weeks, which is a big deal for me. It's from Cooking During Stolen Moments, and I highly recommend that you click through and visit her--she has a lot of excellent recipes.

I tweaked the recipe in a few places. Here's the original recipe, with my "tweaks" in bold. If you just want the original, without my chicken scratches all over it, click through the link above.


  • 1/4 c. butter


  • 1 medium-sized shallot, minced (I used about 1/2 teaspoon onion powder instead--I don't like actual onions, so I don't keep them on hand.)


  • 3 cloves garlic, minced (The first time, I used 3/4 garlic powder instead. Use the fresh garlic if you like a stronger garlic flavor.)


  • 1 15 oz. can pumpkin puree


  • 1/2 c. chicken stock


  • 3/4 c. milk (I use whole milk--here are three articles on why: 123. I didn't have any milk on hand tonight, so I used extra chicken stock, and it turned out fine.)


  • 1 1/4 t. salt, more or less to taste (If you used extra chicken stock instead of milk, use less salt! You can always add more.)


  • 1/2 t. black pepper, more or less to taste


  • 1/8 t. nutmeg (DO NOT LEAVE THIS OUT. Just trust me on this one.)


  • 1/4 c. diced parsley (I used about 1 - 2 teaspoons dried parsley.)

    1. Melt the butter in a large skillet over medium heat. Add the shallot and garlic; cook for 2-3 minutes, until shallots are tender. (If you use onion powder and garlic powder, sprinkle them into the melted butter and let it cook for just under a minute. Don't let the powders burn.)
    2. Reduce heat to low and stir in the pumpkin puree. Cook for 2 minutes. Add the chicken stock, milk (or more stock), salt, pepper and nutmeg (Don't forget the nutmeg!). Stir to combine and simmer over low heat for about 5 minutes (I wanted the sauce to be a little more runny, so I added a little extra chicken stock at this point.). Taste and adjust the salt and pepper, if needed. Stir in the parsley. Serve over pasta. (Cheese ravioli is awesome. I used rainbow rotini the second time, and it was still pretty good.)


  • Monday, August 8, 2011

    Green Smoothie Popsicles

    Two things you should know before you read this post:
    1. My mind was totally blown when I realized I could freeze smoothies in popsicle molds--I love real-fruit popsicles, but I don't like all the sugar.
    2. I'm afraid of blenders.
    So I told Little Boy (months ago) that we could make some popsicles. Someday. And then I forgot. And forgot and forgot and forgot and forgot....
    But I finally did it today. Since green smoothies (that is, a smoothie with leafy greens in it) are all the rage right now, I decided to use a green smoothie recipe for our popsicles.
    See, they don't even look green. Little Boy was concerned that "green" popsicles would taste like limes. He doesn't like lime popsicles.
    I used the first recipe on this site. Fruit, spinach, no sugar. (Edit: I made half of the recipe. It was the perfect amount for eight little popsicles.) We haven't tasted them yet, but the smoothie was pretty good before freezing it.
    Little Boy is REALLY hoping that tomorrow will be warm. Warm means that Mommy will let him eat a popsicle.

    Tuesday, January 11, 2011

    Recipe Link: Bacon & Cheese Muffins

    So...I've mentioned before that I bake a lot of muffins. I used to hate making muffins, because they always turned out terrible. But for some reason, ever since I started using recipes from food bloggers, my muffins have turned out great. Apparently food bloggers know something (or a million things...) that I don't. Anyway, I tried these Bacon & Cheese Muffins last night. Bacon and black pepper in muffins?! Yep. They're savory--no sugar at all--so they're kind of like muffin-shaped biscuits. With bacon and cheese in them! They were delicious, of course. Here's the link (incidentally, this blogger's recipes have never let me down): Bacon and Cheese Muffins, by Stolen Moments Cooking Enjoy!

    Wednesday, November 24, 2010

    Easy Thanksgiving Recipe: Cranberry Sauce

    [I know this is last-minute, but I was cooking up some of this stuff just now and I thought...I really should share this recipe.]


     Is that what your family's cranberry sauce is going to look like tomorrow? Really?

    I have to admit, I kinda like the canned stuff. But did you know that making cranberry sauce [y'know, with real cranberries] is simple? In fact, I first found this recipe in Real Simple magazine. See what I did there? Haha.

    Anyway, I made this cranberry sauce last year for Thanksgiving, and I'm probably going to make it every Thanksgiving for the rest of my life. It tastes that much better. (Unless you really don't like cranberries at all. In that case, I can't help ya.) You can check out the original cranberry sauce recipe if you want. I've changed it just a little bit, so here's the really simple cranberry sauce I'm making this year:

    Homemade Cranberry Sauce
    (heavily based on a recipe from Real Simple
    1 package cranberries (I think the standard-size package is 12 oz or so.) 
    1 cup apple juice 
    1/3 cup sugar 
    1/4 cup (heaping) brown sugar 


    Combine all ingredients in a medium saucepan. Simmer, stirring frequently, until almost all of the cranberries have burst, and the sauce has thickened. (I usually make the sauce quite a bit thicker than what's pictured with the original recipe.) 


    Taste and add more sugar if needed--some cranberries are kickier than others. Also, keep an eye on how vigorously those berries are simmering--if it gets to a full-out boil, you'll be wiping up cranberry splatters.

     Really and truly--all you have to do is measure, dump, and stir. That's it. Oh, and eat. And then do a little happy dance because you've freed your family from canned cranberry sauce forever. {sauce photo credit}

    Tuesday, August 3, 2010

    Recipe Link: Sour Cream & Jam Muffins

    I love muffins. They're quick and easy to mix up, Little Boy loves them, and they're DELICIOUS. Well...they're delicious if you have a good recipe. And this, my friends, is a good muffin recipe. Have you ever visited Cooking During Stolen Moments? I've tried a few of her recipes, and I have not been disappointed. But, seriously, check out this recipe first: Sour Cream & Jam Muffins. I made them in a regular-sized muffin tin, and they turned out beautifully. And deliciously.

    Friday, April 16, 2010

    Recipe: Fudgy Frosting


    {This...is clearly not my cupcake. And it has nothing to do, really, with the following recipe. Click here for the photo source and more pictures of cute cupcakes.}

    This is the best frosting I have ever eaten {again, this has nothing to do with the cupcake up there}. I put it on my birthday cupcakes this week. And thanks to this frosting, my birthday turned out to be delicious.

    A quick note: yes, making frosting takes a bit more time than using frosting from the store. And a bit more effort. But not much more. Homemade frosting is also better for you than the stuff at the store--it's still junk food, but at least you can pronounce all the ingredients in it. Anyway, on to the recipe.

    Fudgy Frosting
    adapted from a recipe in my mom's Pillsbury cookbook

    1/2 cup butter
    1/2 cup cocoa powder (heaping, if you like dark chocolate. Which I do. And it really makes this frosting yummy)
    3 cups powdered sugar
    1/4 cup milk
    1 teaspoon vanilla

    Melt butter in a saucepan on the stove. Add the cocoa powder, and heat it until it barely starts to boil. Remove from heat, and pour into a large bowl. Let it cool for a minute or two. Add the rest of the ingredients and mix it all together. Add more milk if you like it a little runnier.

    And try to restrain yourself from eating it all straight out of the bowl. Which I would have done, if my cupcakes hadn't looked so naked.

    Monday, March 29, 2010

    Recipe: Cinnamon Muffins

    {image source}

    I just made these for the first time today, and oh...man. They're my new favorite muffin. [I based it on another recipe, but that blog that hosted it has since been taken down.]

    Cinnamon Muffins

    1/4 cup butter
    1/4 cup sugar
    1 egg
    1/2 teaspoon vanilla (I always add a little more, so...probably more like 3/4 teaspoon.)
    1 1/4 cups flour
    2 t baking powder
    dash salt
    1/4 teaspoon (heaping) ground cinnamon
    1/3 cup milk

    Preheat oven to 375*. In a bowl, cream sugar and butter together. Add vanilla and egg. Mix well, then add flour, baking powder, salt, cinnamon, and milk. Mix only until blended. Spoon batter into prepared muffin tins (greased or lined). Bake for 15 minutes.

    **Note: This recipe only came out to about six muffins for me. I don't know if I just make huge muffins, but you might want to double the recipe.

    Wednesday, March 3, 2010

    Recipe: Cowboy Cookies

    {image source} I've eaten a lot of cookies in my life. (Who hasn't?!) And most of them were good, but only a few of them were REALLY good. And I want you guys to know that I wouldn't share a cookie recipe with you unless it was REALLY good. And this one is. This is Isaac's Aunt Dawn's recipe (hi Dawn!), and I don't know where she got it. The instructions before the recipe are hers, too. Cowboy Cookies The secret to making these taste SUPER good is to use ½ cup real butter and ½ cup margarine (a trick I learned from my nephew Ben) and use 1 cup of all-purpose flour and 1 cup of freshly ground whole wheat flour (a trick I made up myself). Then? Perfection! And don’t leave out the pecans. That would be a BIG mistake, baby! 1 cup butter or margarine, melted 1 cup granulated sugar 1 cup firmly packed brown sugar 2 eggs 1 teaspoon vanilla extract 2 cups all-purpose flour 1 teaspoon baking powder 1 teaspoon baking soda ½ teaspoon salt 2 cups quick-cooking oats 1 package (12 ounces) semisweet chocolate chips ¾ cup chopped pecans Preheat oven to 350 degrees. In a large bowl, beat butter and sugars until creamy. Add eggs and vanilla; beat until smooth. In a small bowl, combine flour, baking powder, baking soda, and salt. Add dry ingredients to creamed mixture, stir until a soft dough forms. Stir in oats, chocolate chips, and pecans. Drop tablespoonfuls of dough 2 inches apart onto a lightly greased baking sheet. Bake 9 to 11 minutes or until edges are lightly browned. Transfer cookies to a wire rack to cool. Store in a airtight container. Yield: about 5 1/2 dozen cookies Giddyup!

    Monday, February 2, 2009

    I'm Baaaaaaack...I Think.

    I've mentioned before that I don't blog much when I'm not feeling well [or, if I do blog, it's memes and Wordless Wednesdays.]. And I haven't been feeling well. But I'm feeling better now. So far. And even though I didn't blog, I did manage to take a few pictures last week.


    I found this note on the fish tank when I came downstairs one morning. The other fish, Ron Weasley, is blurrily alive and well.

     
    My sister sent me a recipe for microwaveable chocolate cake. I tried it. I failed. [I may have altered the ingredients a little bit.]

     
    This is Little Boy's "silly face". Or, as he says it, "thi-thee" face.

    Which just goes to show that even when the fish die and the chocolate cake fails to be chocolate cake, a thi-thee face can still cheer me up.

    Friday, January 9, 2009

    Still Not Drowned, Plus a Recipe

    I have a couple of things to blog about this evening. First, it's finally stopped raining. Our apartment didn't flood, but I know a couple of people who had to leave their homes. So what do you do in a small town when school's canceled and the river's flooded? Why, go look at the flood, of course.

    A lot of people had the same idea, so I don't feel too weird. I know the pictures are bad; I took them all from inside the car. I'm only posting a couple pictures of the water. But maybe you can still get the idea.


    Here's our local river. It was a good three times wider than usual.


    This one's pretty hard to see, but the guy in the reddish jacket is standing at the edge of the water. The river shouldn't be visible from this road--it should be on the far side of those furthest trees.

     
    I wore my big, red rubber boots--you know, just in case. Haha.


    Little Boy was so excited. Or...not.

    And second, I've been meaning to post this recipe--it's one of Isaac's favorites. It's adapted from Ricky Martin's Rice & Beans on Meatless Monday:

     2 T olive oil
    1/2 c chopped onion (I only use onion powder, though)
    1/2 c chopped green bell pepper
    2 garlic cloves, pressed
    3/4 c water
    1/4 c tomato sauce
    1/4 t dried oregano
    1/4 t salt
    1/4 t chili powder
    1 15.5-oz can of whatever beans you like
    6 c cooked brown rice*

    In a large saucepan, heat oil over medium heat. Add onion, bell pepper, and garlic. Cook 5 minutes, stirring often. Stir in water, tomato sauce, oregano, salt, and chili powder. Bring to a boil and stir in beans. Reduce heat to low, cover, and simmer 15 minutes, stirring occasionally. Serve beans over rice. Serves 4.

    *I like to cook the rice with chicken stock instead of water, but it's not necessary.

    Related Posts Plugin for WordPress, Blogger...